So now you have your precious DOS Retromachine installed with all its necessary components to begin playing the games you always wanted to; and having a lot of original Big Box Games is a plus because you can install them directly from the CD-ROM or floppy. But what about the ones you download from one of the many abandonware sites out there? How are you going to copy them over ? Well, wouldn’t it be great if you just could copy them over via your personal network ? This post, being a little tutorial, will show you how to setup a link between a DOS PC & a Windows PC …
What do you need ?
- A machine with DOS installed 😉
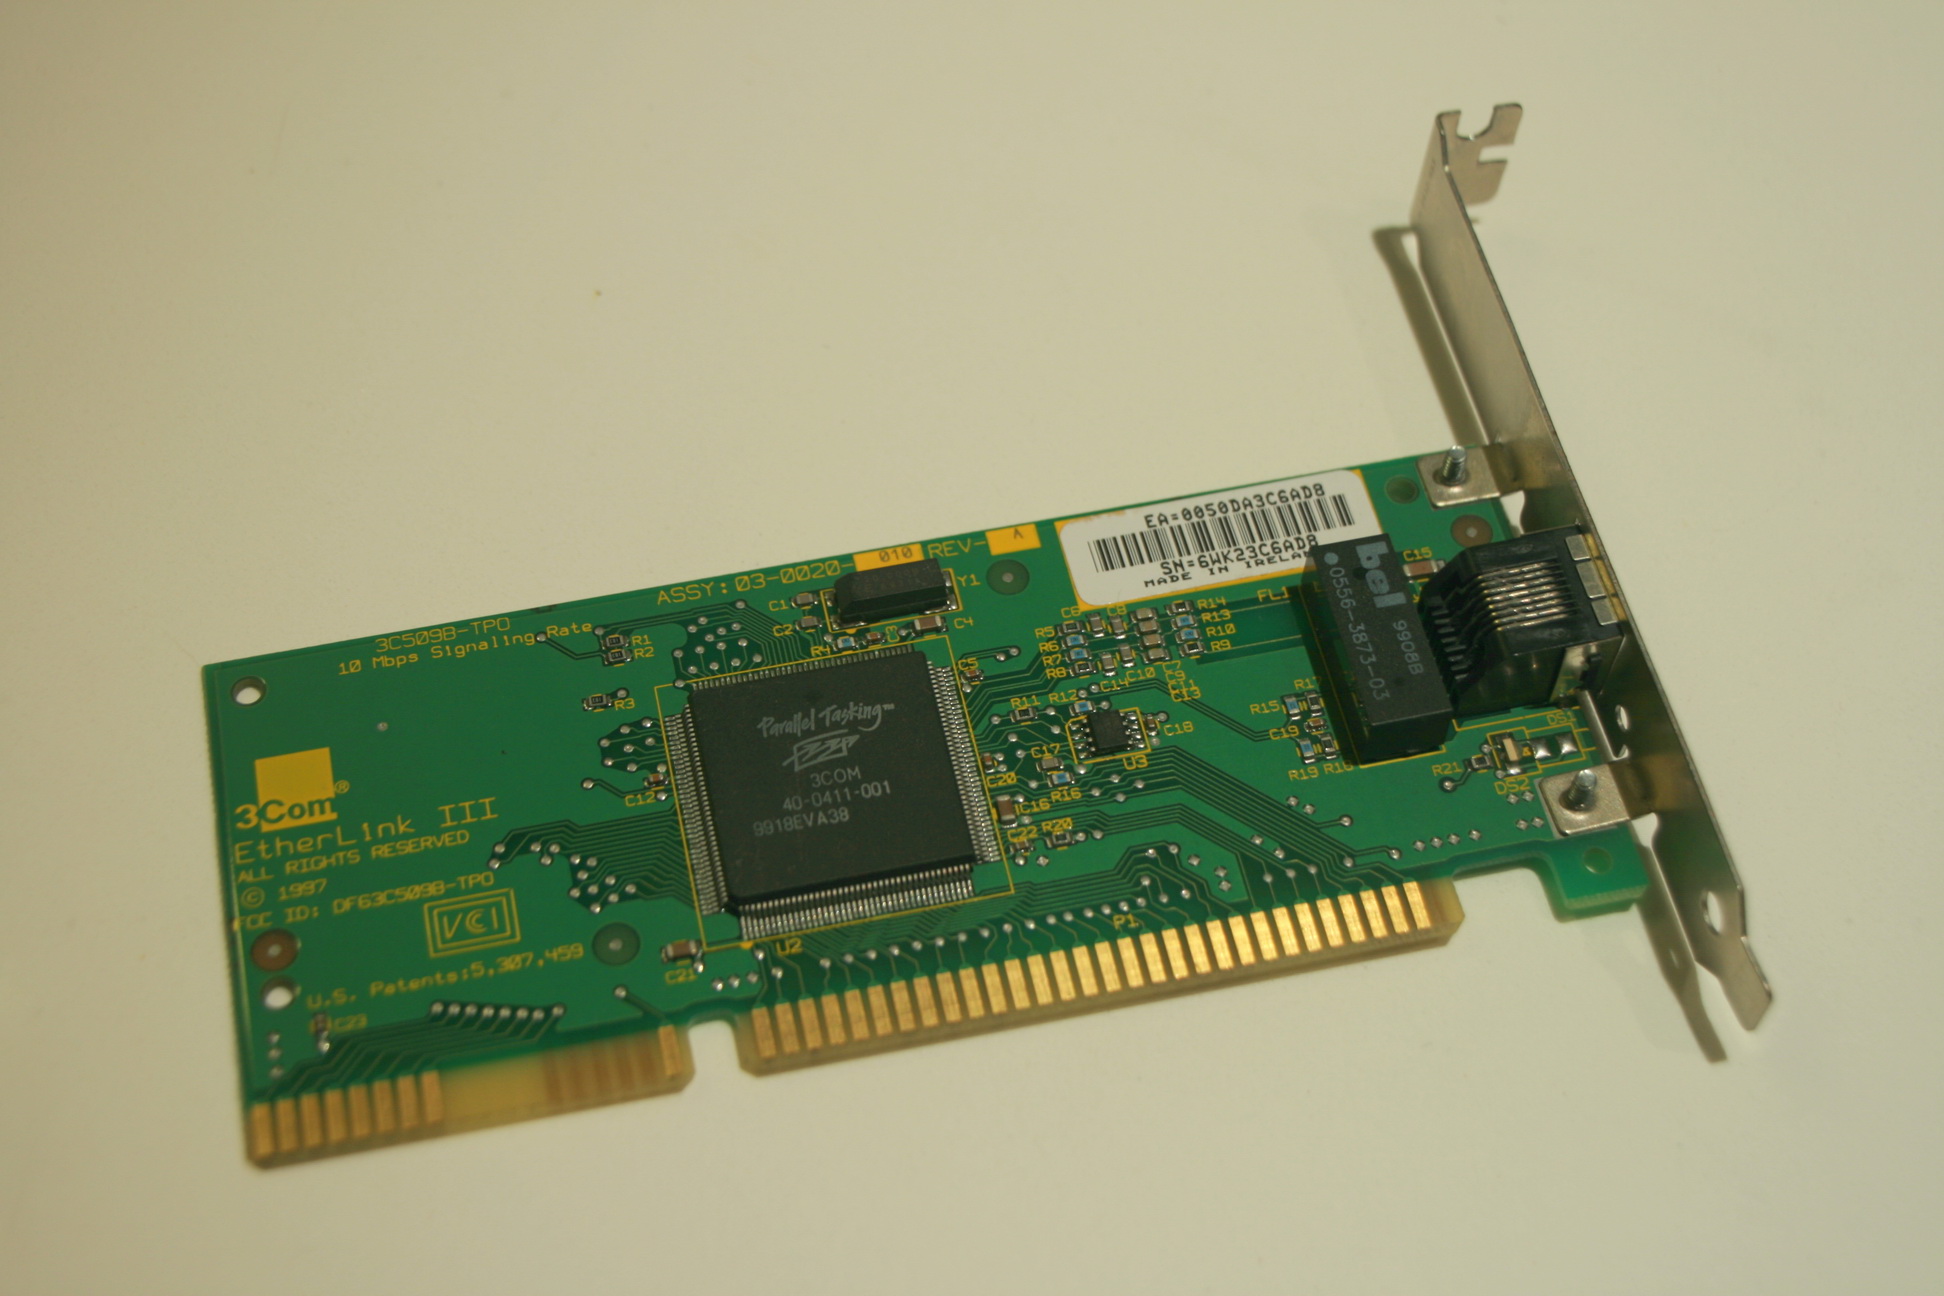
- A network interface card (mine is an ISA Etherlink III from 3COM)
- Microsoft Network Client 3.0 For MS-DOS (2 floppies)
- Network Card Driver Disk (1 floppy)
1 Before you begin
Checking the IRQ of the network card, so it doesn’t conflict with other peripherals in your system.
For those who don’t know what an IRQ is, well … an IRQ of a device is a Hardware Interrupt Request, which needs to be unique per device, because the device needs some sort of channel to speak to the processor. When the device (such as a keyboard or mouse) initiates a hardware interrupt request, it directly sends data to the processor. When moving the mouse or typing in letters from the keyboard, the state of the mouse or the array of letters are send to the processor. The active program running at that time receives the data and can treat it as such and decide what to do with it.
When 2 devices share the same IRQ in a system, none of the 2 devices will work properly, and at that time we talk about an IRQ conflict. This means it needs to be identified and resolved.
IRQs are identified by a number (source: wikipedia) :
The ones in bold are the ones we can use for our extension cards we install ourselves.
- Master PIC
- IRQ 0 — system timer (cannot be changed)
- IRQ 1 — keyboard controller (cannot be changed)
- IRQ 2 — cascaded signals from IRQs 8–15; — any devices configured to use IRQ 2 will actually be using IRQ 9
- IRQ 3 — serial port controller for serial port 2 (shared with serial port 4, if present)
- IRQ 4 — serial port controller for serial port 1 (shared with serial port 3, if present)
- IRQ 5 — parallel port 2 and 3 or sound card
- IRQ 6 — floppy disk controller
- IRQ 7 — parallel port 1. It is used for printers or for any parallel port if a printer is not present.
- Slave PIC
- IRQ 8 — RTC Timer
- IRQ 9 — The Interrupt is left open for the use of peripherals. open interrupt / available or SCSI host adapter; — any devices configured to use IRQ 2 will actually be using IRQ 9
- IRQ 10 — The Interrupt is left open for the use of peripherals. open interrupt / available or SCSI or NIC
- IRQ 11 — The Interrupt is left open for the use of peripherals. open interrupt / available or SCSI or NIC
- IRQ 12 — mouse on PS/2 connector
- IRQ 13 — CPU co-processor or integrated floating point unit or inter-processor interrupt (use depends on OS)
- IRQ 14 — primary ATA channel
- IRQ 15 — secondary ATA channel; ATA interface usually serves hard disks and CD drives.
To be able to set the IRQ for our network card, 3COM provides a utility to do that : The “Configuration and Diagnostic Program Version 3.2”.
In our case we set the IRQ to 10 and the I/O Base Address to 210h.
2 Installing Microsoft Network Client 3.0
To ease the installation I have copied the 2 floppies to disk, but you can also use the 2 floppies if you like the sound of the drive ;-). Once that is done you can execute ‘setup.exe’.
I’m not going to list up all the installation screens here,’cause i have a vid later on for that were you can see step by step how I have done it.
The important thing is that you configure your DOS machine in the same workgroup and that you use the same username & password as your windows PC.
By default the IPX protocol is selected, but we’re going to need the TCP/IP protocol.
One thing left before the installation begins is to change the I/O Base Address of the NIC. (210h).
When the installation finishes, choose F3 to exit, because before we reboot we’ll need to change some things in some of the config files.
In the C:\NET\SYSTEM.INI you have to change ‘Filesharing’ from ‘no’ to ‘yes’.
Now we can reboot …
When the machine comes back up, you’ll be prompted with your default user, so press ‘Enter’ to confirm. Entering the password for the first time, please use the same password as your windows PC. It will suggest to create a password-list and answer yes to do so. Confirm the password and voila, we are booted up with the TCP/IP protocol in DOS.
3 Setting up a fileshare on the DOS machine
Before we can setup a fileshare, you have to run the ‘share.exe’ command. This makes sure DOS can handle sharing & locking capabilities on your disks & network drives.
Then, the command to setup a share is : ‘net share games=c:\games /full’.
The first time it will ask to start the ‘Server service’, so please answer Yes.
After is says ‘The command completed successfully’ you can check your shared resources with the following command : ‘net share’.
4 Copying games from your windows machine to your DOS rig
Choose to map a network drive via windows explorer.
Fill in as destination: ‘\\DX2-80\Games’. Wait a bit and kaboom, you know have fully access to your dos games directory from your windows machine.
All that is left do to for you is to choose what games you want to play and copy them over 😉
Watch the following vid that shows all what I’ve just explained :
– Vulturius